드디어 우리는 access token을 얻는 마지막 단계에 도달했다.

1. 요청 URI 양식
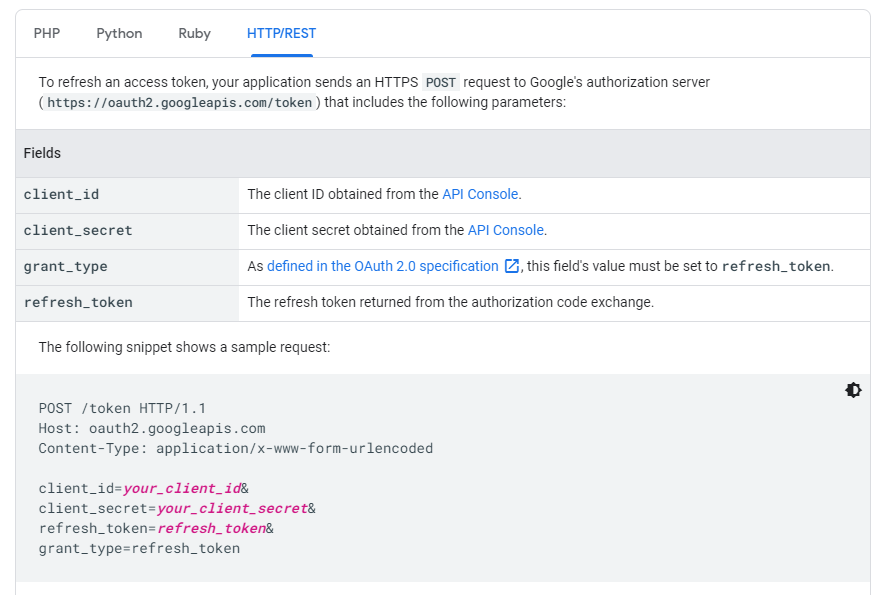
Client는 Authorization Server에게 access token을 받기 위해, 최종 인증을 위한 요청 URI을 작성해야 한다. 공식 문서에서 양식을 살펴보자.
먼저, endpoint는 "https://oauth2.googleapis.com/token"이라고 명시되어 있다.
그리고 client_id, client_secret, code, grant_type, redirect_uri은 모두 필수 파라미터이다.

- client_id : API 콘솔 인증 정보 페이지에서 찾을 수 있음
- client_secret : API 콘솔 인증 정보 페이지에서 찾을 수 있음. 노출되어서는 안되는 비밀번호.
- code : 발급 받은 authorization code
- grant_type : 승인 type. authorization_code라고 설정하면 됨
- redirect_uri : API 콘솔 인증 정보 페이지에서 승인된 리디렉션 URI. Resource Owner가 요청했을 때의 redirect_uri 값과 동일하게 설정하면 된다.
2. 요청 URI 작성
요청 URI로 요청을 보낼 수 있도록 receiveAC.mustache를 수정했다.
client_secret은 기밀정보이므로 POST 방식으로 전송하도록 했다.
<html>
<head>
    <meta charset="UTF-8">
    <title>Google Calendar</title>
</head>
<body>
    <form id="acform" action="https://oauth2.googleapis.com/token" method="post"
          enctype="application/x-www-form-urlencoded">
        <input type="hidden" name="code" value="{{code}}">
        <input type="hidden" name="client_id" value="499264841555-1kqekv3g1khc8jn5848cn1i8pcp12t29.apps.googleusercontent.com">
        <input type="hidden" name="client_secret" value="415QTI...생략">
        <input type="hidden" name="redirect_uri" value="http://localhost:8080/receiveAC">
        <input type="hidden" name="grant_type" value="authorization_code">
    </form>
    <script type="text/javascript">
        this.document.getElementById("acform").submit();
    </script>
</body>
</html>
<소스 코드 설명>
1) {{code}}
전송 받은 code(authorization code)를 자동으로 적용 할 수 있게 하기 위해, mustache template 엔진에서 제공하는 기능을 이용한 것이다. code를 변수로 사용할 수 있게 중괄호 2개로 감싸줬다.
이 방법을 사용하려면 전송 받은 code(authorization code)값을 활용할 수 있도록 하는 사전 작업이 필요하다.
필자는 SpringBoot의 Controller를 이용하여, 전송 받은 code값을 receiveAC.mustache로 전달했다.
package com.example.demo.controller;

import org.springframework.stereotype.Controller;
import org.springframework.ui.Model;
import org.springframework.web.bind.annotation.GetMapping;
import org.springframework.web.bind.annotation.RequestParam;

@Controller
public class HomeController {

    @GetMapping("/goocal")
    public String goocal(Model model){
        return "goocal";
    }

    @GetMapping("/receiveAC")
    public String receiveAC(@RequestParam("code") String code, Model model){
        model.addAttribute("code",code);
        return "receiveAC";
    }
}
2) redirect_uri
redirect_uri의 값을 encode 하지 않고 그대로 붙여 넣은 이유는 form 태그의 enctype 속성값을 "application/x-www-form-urlencoded"로 설정했기 때문이다.
3) <script>
form을 submit하는 과정을 자동화하기 위하여 javascript를 사용했다.
3. 요청 URI 전송
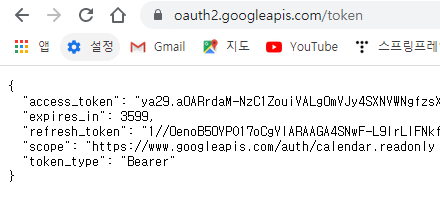
SpringBoot를 재시작하고, 프로젝트 내에서 구글 로그인을 수행했더니 성공적으로 access_token값과 refresh_token값을 받을 수 있었다.

- expires_in : access token의 lifetime을 초 단위로 나타낸 것으로, 약 1시간 정도 되는 것 같다.
- token_type : 반환받은 token의 type
4. Refresh Token으로 Access Token 갱신하기
이전 내용들을 모두 이해했다면, 이제 여러분은 요청 파라미터들이 주어졌을 때 요청 URI를 작성해서 요청을 Resource Server로 보내는 방법을 알게 된 것이다.
Refresh Token값으로 Access Token값을 갱신하는 방법도 문서에 잘 안내 되어있으니, 이 부분은 필요 시 위에 같이 했던 과정들을 참고하여 여러분들이 각자 해보길 바란다.

5. Access Token 사용하기
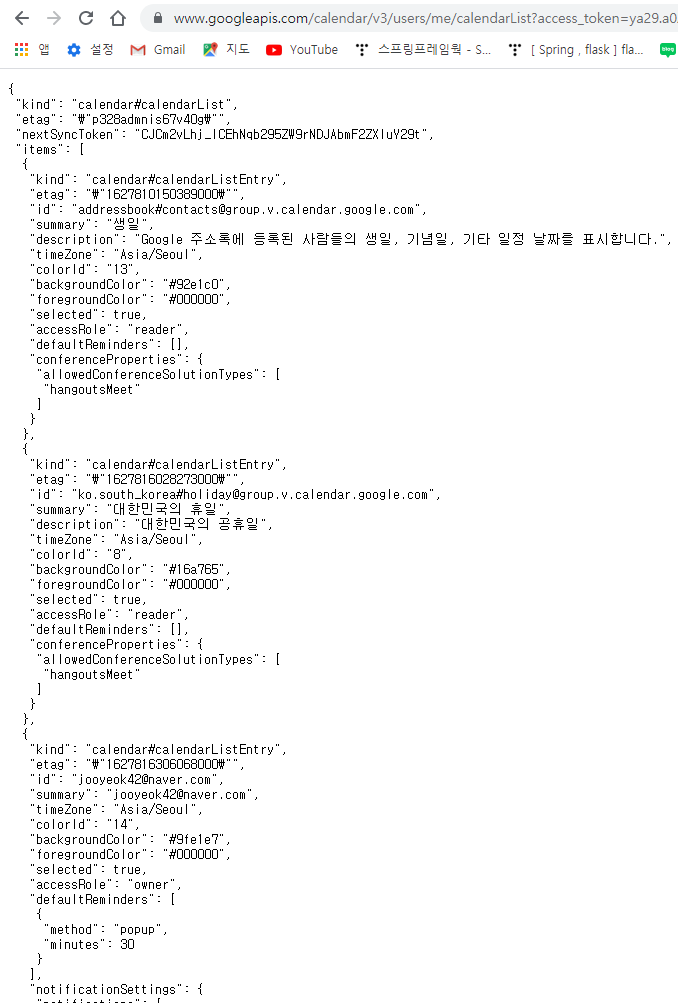
발급 받은 Access Token을 이용하여 REST 방식으로 CalendarList를 조회해보았다.

요청 URL
https://www.googleapis.com/calendar/v3/users/me/calendarList
?access_token=[access_token 값]
응답 메세지

'OpenAPI > OAuth' 카테고리의 다른 글
| [OAuth] Kakao Login(1) - 내 애플리케이션 설정 (0) | 2021.08.07 |
|---|---|
| [OAuth] Google Calendar(4) - 내 서비스에 적용하기 (3) | 2021.08.04 |
| [OAuth] Google Calendar(2) - Authorization code 받기 (0) | 2021.08.02 |
| [OAuth] Google Calendar(1) - API 문서 읽기 (0) | 2021.08.01 |
| [OAuth] OAuth 2.0 소개 (0) | 2021.07.13 |


댓글