이전 포스팅에서는 로그인(인증)에 실패 했을 때의 처리를 돕는 로그인 실패 핸들러를 커스터마이징 했었다.
[Spring] Spring Security(4) - 로그인 실패 커스터마이징
이번 포스팅에서는 Spring Security(3) 에서 소스 코드가 변경된 파일 위주로 설명하고자 한다. kimcoder.tistory.com/248 [Spring] Spring Security(3) - DB연동 Spring Security(1), (2)에서는 아이디, 비밀번호..
kimcoder.tistory.com
이번 포스팅에서는 로그인 성공 핸들러를 커스터마이징 해볼 것이고, 로그인한 사용자의 인증 정보가 들어있는 Authentication 객체도 다뤄볼 것이다.
그리고 이전 Spring Security(4) 포스팅에서, 이미 인증이 완료된 사용자가 다시 로그인 페이지에 접속하는 경우를 분리해서 처리해야 한다고 언급했다. 이 작업을 이번 포스팅에서 할 것이며, 이와 관련된 설명은 보라색으로 강조하겠다.
사용자가 로그인 페이지에 접속하는 경우의 수가 있다.
- 경우 1) 로그인 인증을 위해 Spring Security가 요청을 가로챈 경우
- 경우 2) 사용자가 직접 로그인 버튼을 누른 경우
- 경우 3) 사용자가 처음부터 로그인 링크를 타고 들어오는 경우 [예) 즐겨찾기]
로그인 인증에 성공했을 경우 사용자를 어느 경로로 보내줄지 위 3가지 경우에 따라 다르게 고려해야 한다.
이 과정이 이번 포스팅의 핵심 내용이며, 이를 제대로 구현한다면 사용자에게 한층 더 나은 서비스를 제공할 수 있다.
먼저 예제 프로젝트의 구성은 이렇다.
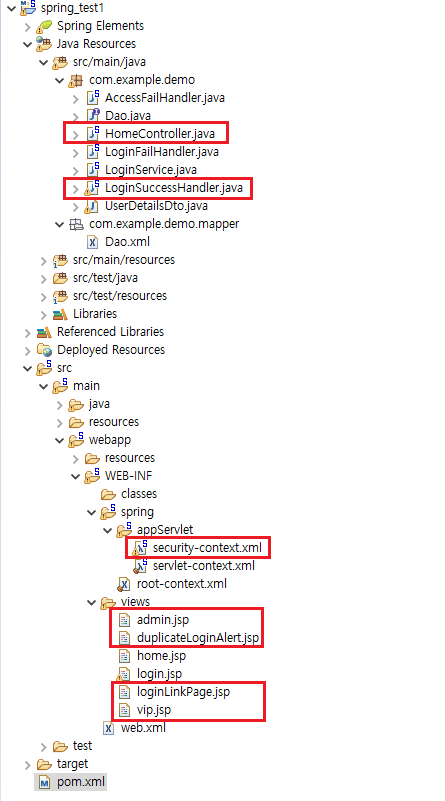
파일이 점점 많아지고 있는 것이 느껴질 것이다.
포스팅이 지나치게 길어지는 것을 방지하기 위해 여러분들이 이전 포스팅부터 잘 따라오고 있다고 가정하고,
수정 되었거나 새로 만든 파일 위주로 설명하는것이 나을 것 같다.
빨간 상자로 표시한 파일들이 이에 해당한다.
1. Context 설정 파일
<security-context.xml>
form-login 설정의 authentication-success-handler-ref 속성에 로그인 성공 핸들러 객체(loginSuccessHandler)를 적용한 모습이다.
그리고 이미 인증된 사용자가 다시 로그인 페이지에 접속하는 것을 막기 위한 처리는 Controller에서 다룰 것이므로, 해당 intercept-url 설정은 제거했다.
<s:intercept-url pattern="/login.html*" access="isAnonymous()"/>
<?xml version="1.0" encoding="UTF-8"?>
<beans:beans xmlns:beans="http://www.springframework.org/schema/beans"
	xmlns:xsi="http://www.w3.org/2001/XMLSchema-instance"
	xmlns:context="http://www.springframework.org/schema/context"
	xmlns:s="http://www.springframework.org/schema/security"
	xsi:schemaLocation="http://www.springframework.org/schema/security http://www.springframework.org/schema/security/spring-security-3.1.xsd
		http://www.springframework.org/schema/beans http://www.springframework.org/schema/beans/spring-beans.xsd
		http://www.springframework.org/schema/context http://www.springframework.org/schema/context/spring-context-3.1.xsd">

	<s:http auto-config="true" use-expressions="true">
		<s:form-login
			username-parameter="user_id"
			password-parameter="user_pw"
			login-processing-url="/login_check"
			login-page="/login.html"
			authentication-failure-handler-ref="loginFailHandler"
			authentication-success-handler-ref="loginSuccessHandler"
		/>
		<s:logout
			logout-url="/security_logout"
			logout-success-url="/"
			invalidate-session="true"
			delete-cookies="true"
		/>
		<s:intercept-url pattern="/vip.html*" access="hasRole('ROLE_USER')"/>
		<s:intercept-url pattern="/admin.html*" access="hasRole('ROLE_ADMIN')"/>
		<s:access-denied-handler ref="accessFailHandler"/>
	</s:http>

	<s:authentication-manager>
		<s:authentication-provider user-service-ref="loginService"/>
	</s:authentication-manager>

</beans:beans>
2. AuthenticationSuccessHandler (loginSuccessHandler)
<LoginSuccessHandler.java>
위에 언급한 로그인 페이지에 접속하는 경우의 수를 주석으로 달아 설명했다.
1) 로그인 인증을 위해 Spring Security가 요청을 가로챈 경우
사용자가 인증이 필요한 페이지로 요청하면 Security가 요청을 가로채 로그인 페이지로 이동하게 된다. 이 때 사용자가 어디로 요청했는지 RequestCache 객체에 저장되는데, 사용자가 로그인에 성공하면 여기에 저장된 경로로 보내주기만 하면 된다.
2) 사용자가 직접 로그인 버튼을 누른 경우
사용자가 인증을 마치면 로그인 버튼이 있던 경로(이전 경로)로 돌려 보내주면 된다. 이전 경로는 Controller에서 request객체의 "prePage" 속성에 저장했으며, Controller은 잠시 후 설명하겠다.
3) 사용자가 처음부터 로그인 링크를 타고 들어오는 경우
나머지 경우에 해당하며, 홈 경로로 이동시켜주기로 했다. SavedRequest 객체와 prevPage속성이 모두 null값일 경우에는 어느 if문도 거치치 않으므로 uri값은 그대로 ContextPath로 유지된다.
package com.example.demo;

import java.io.IOException;

import javax.servlet.ServletException;
import javax.servlet.http.HttpServletRequest;
import javax.servlet.http.HttpServletResponse;

import org.springframework.security.core.Authentication;
import org.springframework.security.web.authentication.AuthenticationSuccessHandler;
import org.springframework.security.web.savedrequest.HttpSessionRequestCache;
import org.springframework.security.web.savedrequest.RequestCache;
import org.springframework.security.web.savedrequest.SavedRequest;
import org.springframework.stereotype.Service;

@Service("loginSuccessHandler")
public class LoginSuccessHandler implements AuthenticationSuccessHandler{

	@Override
	public void onAuthenticationSuccess(HttpServletRequest request, HttpServletResponse response,
			Authentication authentication) throws IOException, ServletException {
		// TODO Auto-generated method stub

		//경우1 : 로그인 인증을 위해 Spring Security가 요청을 가로챈 경우
		RequestCache requestCache = new HttpSessionRequestCache();
		SavedRequest savedRequest = requestCache.getRequest(request, response);

		//경우2 : 사용자가 직접 로그인 버튼을 누른 경우
		String prevPage = (String) request.getSession().getAttribute("prevPage");
		if(prevPage!=null) request.getSession().removeAttribute("prevPage");

		String uri = request.getContextPath();
		//경우1 일 경우 uri에 경로 저장
		if(savedRequest!=null) uri = savedRequest.getRedirectUrl();
		//경우2 일 경우 uri에 경로 저장
		else if(prevPage!=null) uri = prevPage;
		response.sendRedirect(uri);
	}
}
3. Controller
<HomeController.java>
vip(), admin() : Authentication 객체는 인증된 사용자의 정보가 들어있는 객체이며, Principal 이라는 최상위 인터페이스를 상속받는다. Authentication 객체의 getName() 메소드로 사용자의 ID를, getAuthorities() 메소드로 사용자의 권한 리스트를, getPrincial() 메소드로 UserDetails 객체를, getDetails() 메소드로 IP와 Session ID정보를 가진 객체를 반환할 수 있다. 참고로 getDetails() 메소드는 webAuthenticationDetails 객체를 반환할 수 있게 형변환해야 하고, vip.jsp, admin.jsp에서 인증된 사용자의 IP주소를 출력할 수 있게 request객체에 담았다.
login() : request의 getHeader메소드에 "Referer" parameter을 넣어 사용자가 요청한 시점의 URI를 반환했다.
Authentication객체에 데이터가 들어있다는 것은 사용자가 이미 인증을 마쳤다는 의미이므로, null값이 아닐 때는 로그인 페이지로 보내지 않고 duplicateLoginAlert.jsp로 이동시켜준다. duplicateLoginAlert.jsp는 알림창을 띄워주고 사용자가 확인 버튼을 누르면 홈으로 이동시켜주는 역할을 할 것이다. 그리고 만약 로그인에 실패 해서 로그인 페이지가 다시 나오더라도, prevPage 속성에 로그인 페이지 경로가 저장되지 않게 처리했다. 자세한 설명은 주석을 참고하면 좋을 것 같다.
loginLinkPage() : 로그인 페이지에 접속하는 사용자가 직접 로그인 버튼을 누른 경우가 잘 반영되었는지 확인하기 위해 Login버튼이 있는 loginLinkPage.jsp를 새로 생성했다.
package com.example.demo;

import javax.servlet.http.HttpServletRequest;

import org.springframework.security.core.Authentication;
import org.springframework.security.web.authentication.WebAuthenticationDetails;
import org.springframework.stereotype.Controller;
import org.springframework.ui.Model;
import org.springframework.web.bind.annotation.RequestMapping;

/**
 * Handles requests for the application home page.
 */
@Controller
public class HomeController {

	@RequestMapping("/index.html")
	public String home(Model model) {
		return "home";
	}

	@RequestMapping("/vip.html")
	public String vip(HttpServletRequest request, Model model, Authentication authentication) {
		WebAuthenticationDetails wDetails = (WebAuthenticationDetails) authentication.getDetails();
		String ipAddress = wDetails.getRemoteAddress();
		request.setAttribute("ipAddress", ipAddress);
		return "vip";
	}

	@RequestMapping("/admin.html")
	public String admin(HttpServletRequest request, Model model, Authentication authentication) {
		WebAuthenticationDetails wDetails = (WebAuthenticationDetails) authentication.getDetails();
		String ipAddress = wDetails.getRemoteAddress();
		request.setAttribute("ipAddress", ipAddress);
		return "admin";
	}

	@RequestMapping("/login.html")
	public String login(HttpServletRequest request, Model model, Authentication authentication) {
        	String uri = request.getHeader("Referer"); //이전 경로

                //이미 인증된 사용자의 로그인 페이지 접근 방지
		if(authentication!=null) return "duplicateLoginAlert";

        	//이전 경로가 로그인 관련 페이지가 아닐 경우에만 저장, 속성값이 null이 되면 오류가 발생하므로 이 경우도 처리한다.
		if(uri!=null && !(uri.contains("/login.html")||uri.contains("/login_check"))) request.getSession().setAttribute("prevPage", uri);
		return "login";
	}

        //로그인 버튼이 있는 페이지
	@RequestMapping("/loginLinkPage.html")
	public String loginLinkPage(Model model) {
		return "loginLinkPage";
	}
}
4. VIEW
<admin.jsp>
IP주소를 출력하는 코드를 추가했다.
<%@ page language="java" contentType="text/html; charset=UTF-8"
    pageEncoding="UTF-8"%>
<%@ taglib uri="http://www.springframework.org/security/tags" prefix="s" %>
<!DOCTYPE html>
<html>
<head>
<meta charset="UTF-8">
<title>Insert title here</title>
</head>
<body>
	<h1> FOR ADMIN! </h1>
	<s:authorize access="isAuthenticated()">
		<p> Session On </p>
		<p> IP : ${ipAddress} </p>
	</s:authorize>
	<s:authorize access="isAnonymous()">
		<p> Session Off </p>
	</s:authorize>
	<p> HELLO <s:authentication property="name"/> </p>
	<a href="${pageContext.request.contextPath}/security_logout">Log Out</a>
</body>
</html>
<vip.jsp>
여기에도 IP주소를 출력하는 코드를 추가했다.
<%@ page language="java" contentType="text/html" pageEncoding="UTF-8"%>
<%@ taglib uri="http://java.sun.com/jsp/jstl/core" prefix="c" %>
<!DOCTYPE html>
<html>
<head>
<meta charset="UTF-8">
<title>Insert title here</title>
</head>
<body>
	<h1> FOR VIP MEMBERS! </h1>
	<c:if test="${not empty pageContext.request.userPrincipal}">
		<p> Session On </p>
		<p> IP : ${ipAddress} </p>
	</c:if>
	<c:if test="${empty pageContext.request.userPrincipal}">
		<p> Session Out </p>
	</c:if>
	<p> HELLO ${pageContext.request.userPrincipal.name} </p>
	<a href="${pageContext.request.contextPath}/security_logout">Log Out</a>
</body>
</html>
<duplicateLoginAlert.jsp>
이미 인증된 사용자가 로그인 페이지를 요청했을 때 대신 이동되는 페이지이다.
알림창을 띄우고 사용자가 확인버튼을 누르면 홈으로 이동시켜준다.
<%@ page language="java" contentType="text/html; charset=UTF-8"
    pageEncoding="UTF-8"%>
<!DOCTYPE html>
<html>
<head>
<meta charset="UTF-8">
<title>Insert title here</title>
</head>
<body>
	<script>
		alert("이미 로그인 상태거나 접근 권한이 없는 페이지입니다. 메인 홈페이지로 이동합니다.");
		window.location.replace("http://localhost:8181/demo");
	</script>
</body>
</html>
<loginLinkPage.jsp>
아직 인증이 안된 익명 사용자에게만 LOGIN버튼이 보이도록 조건을 붙였다.
<%@ page language="java" contentType="text/html; charset=UTF-8"
    pageEncoding="UTF-8"%>
<%@ taglib uri="http://www.springframework.org/security/tags" prefix="s" %>
<!DOCTYPE html>
<html>
<head>
<meta charset="UTF-8">
<title>Insert title here</title>
</head>
<body>
	<h1>Login Link Page!</h1>
	<s:authorize access="isAnonymous()">
		<button type="button" onclick="location.href='login.html'">LOGIN</button>
	</s:authorize>
</body>
</html>
5. 실행 결과
경우 1) vip.html 혹은 admin.html로 요청 -> 로그인 페이지 -> 로그인 성공시 요청 주소로 이동
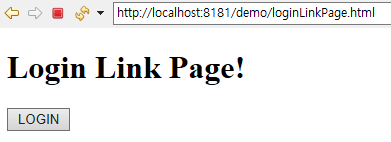
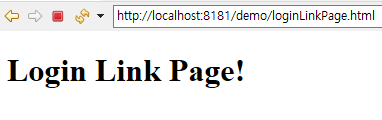
경우 2) loginLinkPage.html로 요청 -> 로그인 버튼 클릭(인증 전) -> 로그인 페이지 -> 로그인 성공시 loginLinkPage 페이지로 이동, 로그인 버튼 사라짐(인증 후)
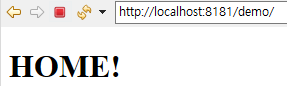
경우 3) login.html로 요청 -> 로그인 페이지 -> 로그인 성공시 홈 페이지로 이동
loginLinkPage.jsp(인증 전)
loginLinkPage.jsp(인증 후)
duplicateLoginAlert.jsp의 알림창

home.jsp
다음 포스팅에서는 유저의 패스워드를 데이터베이스에 암호화 하여 저장하는 방법을 다룰 것이다.
필수 개념이니 꼭 숙지해야 한다.
[Spring] Spring Security(6) - 암호화로 보안 강도 높이기
이번 포스팅에서는 사용자가 회원 가입할 때 데이터베이스에 암호화된 비밀번호를 저장하여 보안 강도를 강력하게 높여주는 방법을 다룰 것이다. 아이디 : test1, 원본 패스워드 : 1234 ("1234"가 위
kimcoder.tistory.com
'Spring Series > Spring Framework' 카테고리의 다른 글
| [Spring] Spring Security(7) - 자동 로그인 기능 추가 (0) | 2021.02.09 |
|---|---|
| [Spring] Spring Security(6) - 암호화로 보안 강도 높이기 (2) | 2021.02.08 |
| [Spring] Spring Security(4) - 로그인 실패 커스터마이징 (5) | 2021.02.02 |
| [Spring] Spring Security(3) - DB연동 (0) | 2021.02.01 |
| [Spring] Mybatis (0) | 2021.01.26 |


댓글