이 예제에서도 DTO, DAO를 이용했다.
DTO와 DAO에 대해서는 아래 포스팅에서 설명했으므로 잘 모르는 분들은 읽고 오는 것을 권장한다.
[JSP Servlet] 데이터베이스(2) - DTO/DAO/ConnectionPool
DAO : Data Access Object, 데이터 베이터의 데이터에 접근을 하기 위한 객체, 유지보수에 좋음 DTO : Data Transfer Object, 데이터 베이스에서 데이터 교환을 위한 javabean들을 의미한다. getter,..
kimcoder.tistory.com
※ 본 포스팅은 필자가 JdbcTemplate, Mybatis를 학습하기 전에 올린 포스팅이기 때문에 여기서는 연동 원리 정도만 파악하고 실제 적용은 저 둘 중 하나의 방법을 이용하는 것을 권장함. 블로그의 Spring Framework 카테고리에 Oracle을 이용한 JdbcTemplate, Mybatis에 대해서는 모두 작성해두었으니 Mysql를 사용할 분들은 연동 원리를 파악하여 그대로 Mysql로 적용하면 된다.
1. Mysql 설치
Mysql 설치부터 세팅까지 모든 과정을 다룬 포스팅이다.
서버 호스팅 구매없이 DB외부접근 허용하기
내가 몇 십 시간 삽을 팠던 내용이지만 여러분들은 이걸 보고 한번만에 성공했으면 좋겠다 Cafe24에서 웹호스팅서비스의 관리 주체는 Cafe24지만, (가상)서버 호스팅은 관리자 계정이 제공되어 직
kimcoder.tistory.com
2. Connector J 설치
Java와 Mysql연동을 위한 Connector/J를 설치해야 한다.
일단 아래 다운로드 사이트로 접속하자.
dev.mysql.com/downloads/connector/j/
MySQL :: Download Connector/J
MySQL Connector/J 8.0 is highly recommended for use with MySQL Server 8.0, 5.7 and 5.6. Please upgrade to MySQL Connector/J 8.0.
dev.mysql.com
Select Operating System 목록에서 여러분들의 개발 환경에 맞는 것을 선택하면 되는데,
윈도우 유저라면 Platfrom Independent로 들어가서 ZIP을 다운 받으면 된다.
Mysql 버전이 낮은 편이라면 접속 시 콘솔창에 "CLIENT_PLUGIN_AUTH is required" 오류가 뜨게 되는데
Archives로 들어가서 더 낮은 Connector 버전을 다운받을 수 있다.
본인은 구 버전의 Mysql 버전을 써서 그런지 저 오류가 떴다. 그래서 8.0.22 버전에서 5.1 버전으로 바꿨다.

3. 라이브러리 설정
적당한 경로에 ZIP 압축을 풀어주고 아래 JAR 파일을 복사하여 Tomcat 폴더의 lib에 붙여넣어 준다.

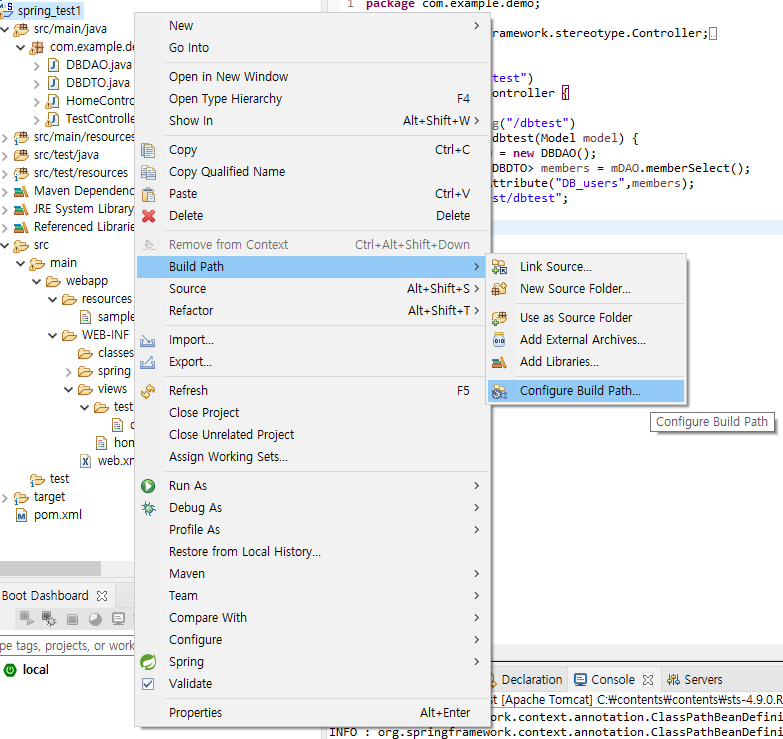
그리고 여러분들의 spring 프로젝트를 우클릭하여 Build Path -> Configure Build Path...로 들어가면
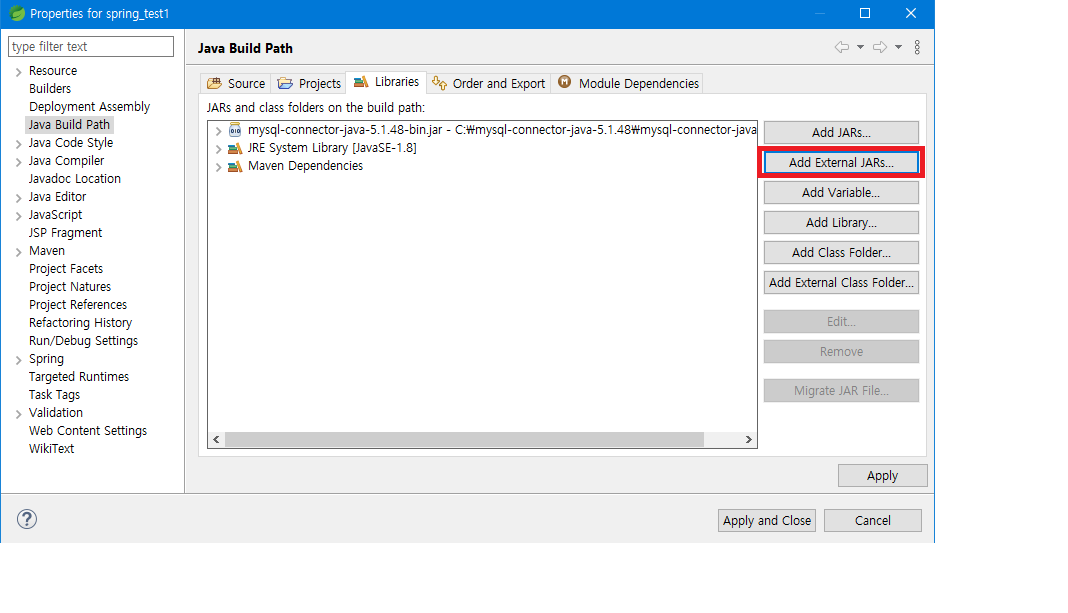
해당 창이 뜨는데 Libraries 탭으로 이동하여 Add External JARs... 로 아까 복사했던 jar 파일을 추가해주고 Apply 해주면 라이브러리 설정은 끝난다.
4. 코딩
이 포스팅에서 설명할 소스파일들의 위치이다.
xml 설정 파일들은 최초 프로젝트 생성시와 동일하기 때문에 생략한다.
- DBDAO.java
- DBDTO.java
- TestController.java
- dbtest.jsp

<DBDAO.java>
맨 위에 링크로 남겨둔 DAO, DTO 포스팅에서 사용했던 DAO코드와 비슷하다. 즉, 자세한 동작 설명은 해당 포스팅을 참고하면 된다.
USER, PASSWORD는 Mysql의 유저명과 비밀번호이며, DRIVER로는 "com.mysql.jdbc.Driver" 을 이용한다.
그리고 URL은 mysql JDBC에서 localhost(개인 기기의 ip주소) 웹서버에 있는 "mydb" 데이터베이스에 접근하겠다는 의미이다.
memberSelect() 함수 : 데이터 베이스에 있는 레코드들을 sql문에 맞게 가져와서 DTO 형태로 객체화 한다. 그리고 그 DTO 객체들을 ArrayList에 모아서 반환한다.
- 미리 생성해둔 mydb 데이터 베이스 -

package com.example.demo;

import java.util.ArrayList;
import java.sql.*;
public class DBDAO {
	private final String USER = "root";
	private final String PASSWORD = "DB비밀번호";
	private final String DRIVER = "com.mysql.jdbc.Driver";
	private final String URL = "jdbc:mysql://localhost/mydb?&useSSL=false";

	public DBDAO() {
		try {
			Class.forName(DRIVER);
		} catch (ClassNotFoundException e) {
			// TODO Auto-generated catch block
			e.printStackTrace();
		}
	}

	public ArrayList<DBDTO> memberSelect(){
		ArrayList<DBDTO> mList = new ArrayList<DBDTO>();

		Connection con = null;
		Statement sta = null;
		ResultSet res = null;

		try {
			con = DriverManager.getConnection(URL, USER, PASSWORD);
			sta = con.createStatement();
			res = sta.executeQuery("select * from users");

			while(res.next()){
				String id = res.getString("id");
				String password = res.getString("password");
				DBDTO mDTO = new DBDTO(id,password);
				mList.add(mDTO);
			}
		} catch (Exception e) {
			e.printStackTrace();
		} finally {
			// 모두 close()가 이루어지도록 따로 try, catch 반복
			// 반환은 생성 순서의 반대로 하는 것이 원칙이다.
			if(res!=null){
				try {res.close(); }
				catch (SQLException e2) {}
			}
			if(sta!=null){
				try {sta.close(); }
				catch (SQLException e2) {}
			}
			if(con!=null){
				try {con.close(); }
				catch (SQLException e2) {}
			}
		}

		return mList;
	}
}
<DBDTO.java>
id와 password가 있는 bean이다.
package com.example.demo;

public class DBDTO {
	private String id;
	private String password;

	public DBDTO(String id, String pw) {
		this.id = id;
		this.password = pw;
	}

	public String getId() {
		return id;
	}

	public void setId(String id) {
		this.id = id;
	}

	public String getPassword() {
		return password;
	}

	public void setPassword(String password) {
		this.password = password;
	}
}
<TestController.java>
client에서 /demo/test/dbtest로 요청 받았을 때 수행할 dbtest 메소드가 있다.
DAO에서 받은 ArrayList<DBDTO> 형의 members 객체를 model 객체에 "DB_users" 라는 속성명으로 담는다.
package com.example.demo;

import org.springframework.stereotype.Controller;
import org.springframework.ui.Model;
import org.springframework.web.bind.annotation.RequestMapping;
import java.util.ArrayList;

@Controller
@RequestMapping("/test")
public class TestController {

	@RequestMapping("/dbtest")
	public String dbtest(Model model) {
		DBDAO mDAO = new DBDAO();
		ArrayList<DBDTO> members = mDAO.memberSelect();
		model.addAttribute("DB_users",members);
		return "test/dbtest";
	}
}
<dbtest.jsp>
컨트롤러에서 담았던 속성("DB_users")을 가져와서 c:foreach 네임스페이스(반복문 역할)로 ArrayList의 요소들을 순서대로 모두 출력해준다.
ArrayList들의 요소들은 DTO이기 때문에 user이 반복 별 DTO가 되며 반복마다 바뀌게 된다.
* jsp에서는 전송 받은 데이터 객체의 private변수도 ${객체.변수} 형식으로 접근 할 수 있다.
* <link> 태그에서 참조한 sample.css는 제목에 색을 입혀보고 싶어서 만든 css파일이며, DB 실행에 영향을 미치지 않는다.
<sample.css>
@charset "EUC-KR";
h1 {
color : red;
}
<%@ page language="java" contentType="text/html" pageEncoding="UTF-8"%>
<%@ taglib uri="http://java.sun.com/jsp/jstl/core" prefix="c" %>
<link rel="stylesheet" href="/demo/resources/sample.css">
<!DOCTYPE html>
<html>
<head>
<meta charset="UTF-8">
<title>Insert title here</title>
</head>
<body>
	<h1> USERS </h1>
	<c:forEach items="${DB_users}" var="user" varStatus="status">
		<strong> ${status.count}. id : ${user.id}, password : ${user.password} </strong><br>
	</c:forEach>
</body>
</html>
접속 결과

'Spring Series > Spring Framework' 카테고리의 다른 글
| [Spring] Controller에서 redirect하기 (0) | 2021.01.05 |
|---|---|
| [Spring] form 데이터 처리 방식 4가지 소개 (0) | 2021.01.04 |
| [Spring] @Controller 보충 설명 (0) | 2021.01.01 |
| [Spring] MVC 프로젝트 구조 파악하기 (2) | 2020.12.31 |
| [Spring] AOP(2) - @(Annotation) 이용 (0) | 2020.12.30 |


댓글